

This is a blog post I have delayed too long since a new feature or update is coming every week, but I will keep it as simple and generic as possible so that it can also be useful in the future. GitHub Copilot already provides a powerful set of AI-assisted tools for D365 Finance & Operations (D365FO) and X++ development. When used effectively, it can help you write code faster, automate repetitive tasks, and significantly ease your development experience.
At the time of writing, VS GitHub Copilot has no built-in servers, tools, or skills for D365FO Xpp development and AOT element modifications. It spends too much effort to set Xpp code and AOT elements correctly, sometimes resulting in incorrect changes, unusual modifications, misplaced elements, and errors. However, it still does a fair job and already proves to be a helpful tool as it is. Microsoft is working on an official Copilot Xpp development MCP server, which, as far as I heard, may be released soon. There are also several readily available 3rd-party Xpp VS Copilot extensions on GitHub that will significantly improve the current Copilot Xpp generation. After the official MS MCP server is released, I plan to write a new follow-up post about it.
Github Copilot chat panel overview
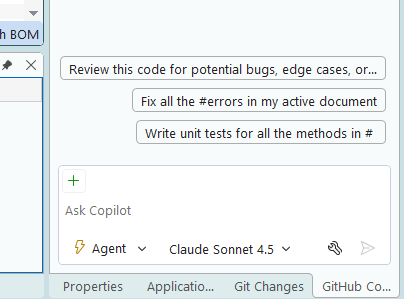
On the bottom left is your chat mode, where you can select 3 chat modes: Agent, Ask, and Plan. Plan mode is a newly added mode that you can give your requirement, task, or FDD document, and Copilot suggest you a work execution plan. If you approve the plan, it transfers it to agent mode for execution. Ask mode is the original chat mode that you can use for brainstorming ideas, asking questions about code, performing minor changes on your document, and reviewing and approving them before they are changed in the code. Agent mode is the automated execution agent that creates and modifies files within your project using PowerShell or Python scripts and performs the fully automated implementation of the tasks.
On the top of the chat panel, the plus sign lets you add files, images, an active document, or a selection in the code to the chat prompt you are planning to give. The tool icon is where you enable or disable Copilot tools and skills; for example, we do not need Azure tools for FO developments. This is where I expect soon to be an Xpp development tool from Microsoft:
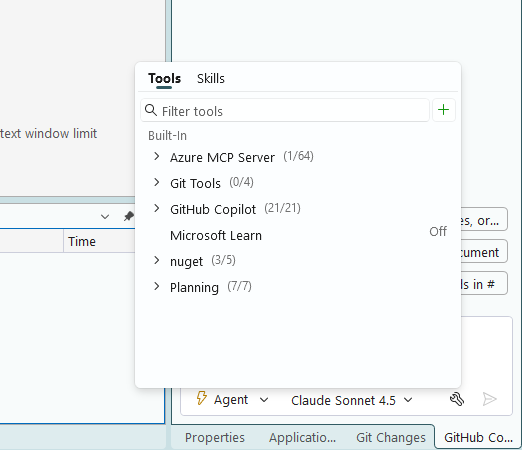
Next to agent mode, you can choose the AI model for the Copilot. There are AI models starting from the first ChatGPT model to the latest Claude Opus 4.8. The latest-newest models you choose here, the more the execution of the tasks costs. The latest Claude models provide better reasoning, research, and generation abilities; however, for only Xpp programming, the difference between the previous Claude Sonnet model and the newest Opus models is quite negligible. So, at the time of writing, I suggest you choose the Claude Sonnet 4.5 model for your Xpp development tasks.
Make it learn your FO best practices
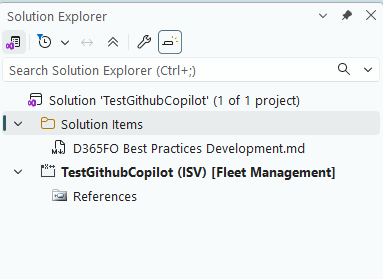
As a first step, I suggest you upload your company’s best practices document and ask the Copilot agent to study it and save it as instructions to its memory. For this task, you can use the highest model, since it has better research and reasoning abilities, and then switch to Claude Sonnet for your normal tasks. The way to do it is, first convert your BP document to MD format, then copy it to your FO solution folder, then add using “add existing items” :
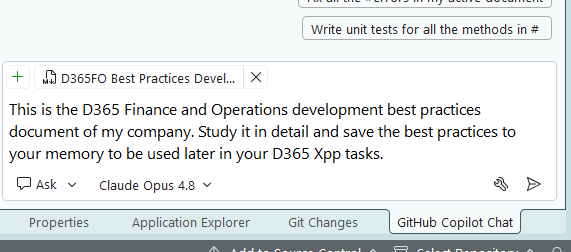
Open the Ask mode of the chat, upload your BP document by choosing the + icon > Files > selecting the BP md file, then ask the agent to study and memorize it:
It will show you a couple of Memory Detected popups to save the instructions to memory. Choose here “Add to repository instructions” if you would like to add it for everyone using the repository or “Add to user instructions” if you would like to use it privately. It will create a “copilot-instructions.md” file in the .github folder of the project you are working on. Copy the contents of this file and save it for your future projects. In the future, you can just create the same file in the same place and copy-paste it :

These instructions are added to all your GitHub Copilot prompts and, as a best practice, should be kept as short and precise as possible. In that sense, this document may look like a long one, but it is worth adding it for the hassle it will reduce in the long term; It will provide shortcuts for code generation and bring the benefit of creating everything already in your company’s format.
Help it with FO folder structure (optional)
At the time of writing, the AI model struggles a lot with FO UDE, model, and AOT folder structures, trying to find element folders every time by checking the other elements in your solution. It also creates the elements inside the project directory first (like dotnet) and then moves them to their FO directories, creating a lot of unnecessary pending files in your git commits.
After Microsoft Xpp MCP server is available, I expect this problem to be solved, but until then, you can help it with adding the folder structure and asking to create elements in project folders by giving your UDE model-package and working folders and further instructions to copilot-instructions.md file :
The temp folder is: C:\Temp\
TST model is located in C:\VS\TST\TestGithubCopilot\metadata\TST\TST
First move the generated files to the temp folder and then to the right AOT subfolder of TST model
Using Plan mode
In the planning mode, you can give your full FDD documents or task descriptions and ask it to create an execution plan for you. However, the Copilot costs of executing a task like this are too high, and the result is far from impressive, with all sorts of faults, bugs, and problems. You can improve the quality of the result by installing one of the Xpp MCP servers I mentioned before, but still, the computing costs of implementation are very high. Therefore, I recommend using this functionality only if it is really required or you somehow have unlimited Copilot usage.
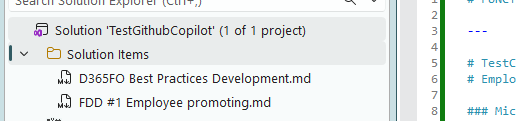
To test it, have an FDD document in hand, convert the FDD document to an MD file (like we did before in the BP document study), and add it to your solution. Then ask the plan agent to create an execution plan:
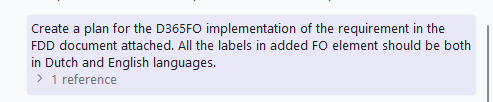
Then it will ask you clarifying questions to answer, until everything is clear:
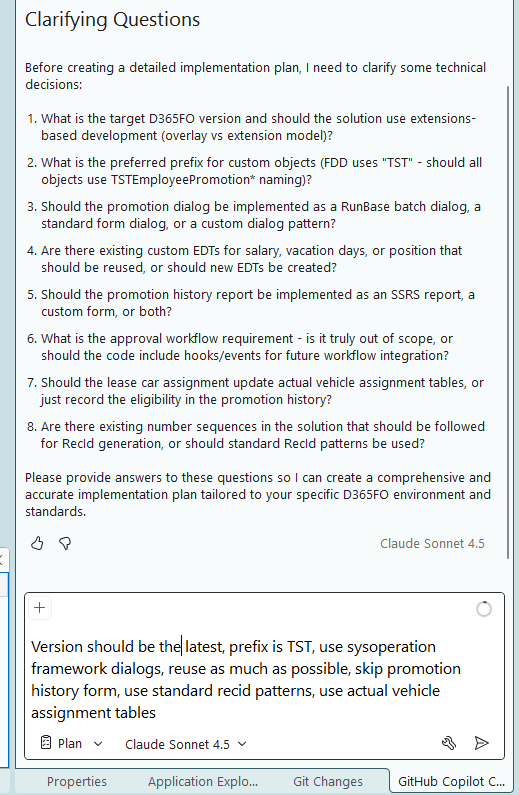
Then there will be an execution plan presented to you with a broad description and plan steps to execute:


When you click the “implement plan” button below, it will pass the execution to the agent, and it will start executing the plan. You will be able to follow the execution progress from the progress bar on top of the plan document:
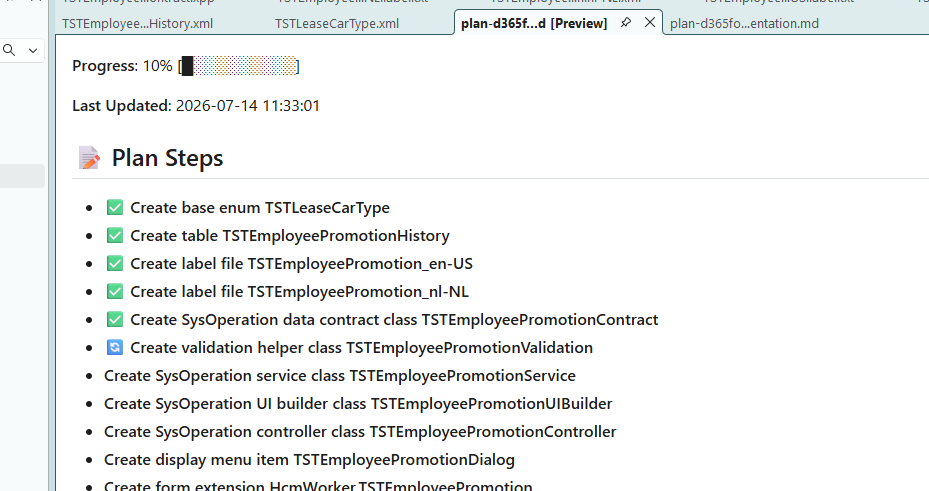
After it finishes, it does multiple builds, synchronisations, and tests, and then you have a complete solution with a couple of bugs and problems for you to solve manually 🙂
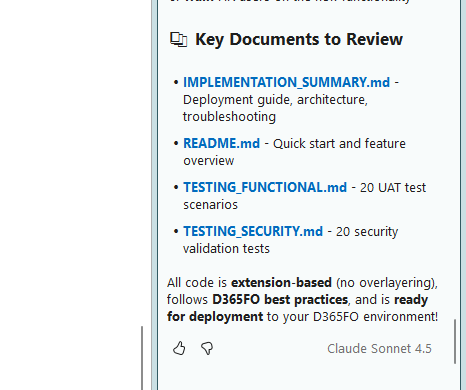
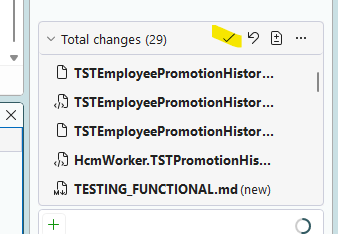
Don’t forget to click on this very small Keep all changes icon on top of the chat window after the implementation is finished; otherwise, changes will not be written to the resulting files:
Using Ask mode
For brainstorming, code research, and smaller inline changes, it is best to use the Ask mode. Ask mode checks the working document, studies the standard FO classes, and gives you responses in its chat window, which you can then review, approve, and apply to your open document. Let’s check some examples of its usage.
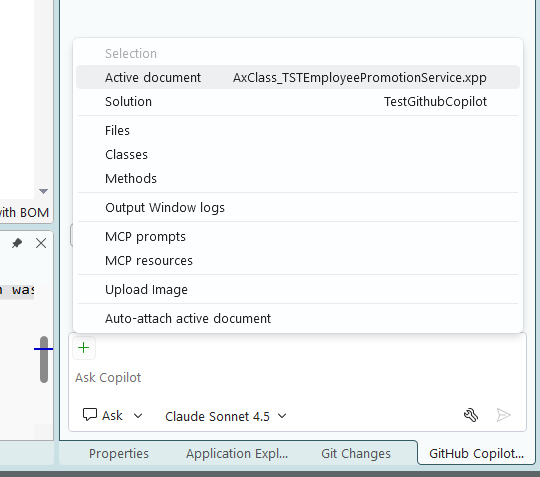
When working with an unfamiliar class, Ask mode can quickly explain what it does. Simply add the class to the chat and request a summary. Click on the + sign and add the active document to the prompt:
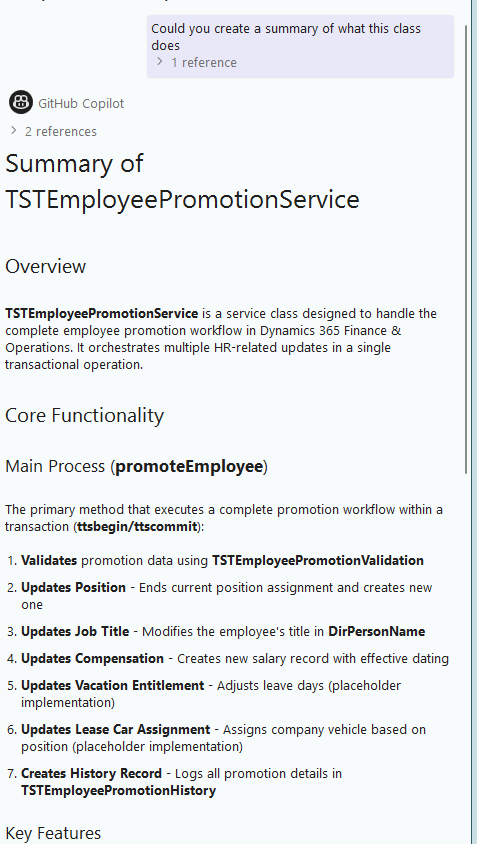
Ask agent to create a summary of the class:
Then let’s ask it to change or adjust a piece of code inside the class. For example, let’s change the select statement below to select all employees instead of the firstonly employee record (does not make sense, but to show what the chat agent can do..). Highlight the code in the editor, click the + icon in Copilot chat, and select “Selection” from the top. Then write and execute your prompt:

It will create the following result. After you confirm the change, you need to click Insert at the cursor or insert in the active document. Select “insert at cursor” here:
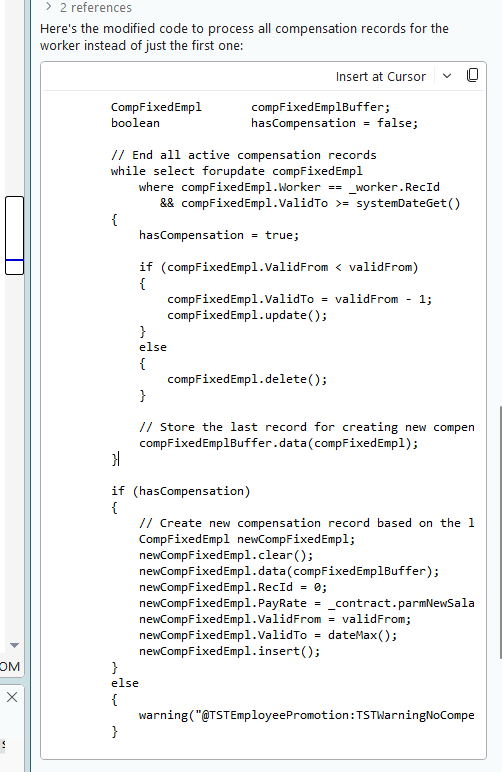
Then you will see the overview of the changes. You can click the Keep or Undo buttons to apply or discard them:

Besides code changes, you can also ask the agent to create FO labels in various languages; however, in ask mode, they will be represented as separate boxes for each language. To apply them as labels, open the correct label language files in the editor and click “Apply in active document” in the box to add them to the end of the label files:
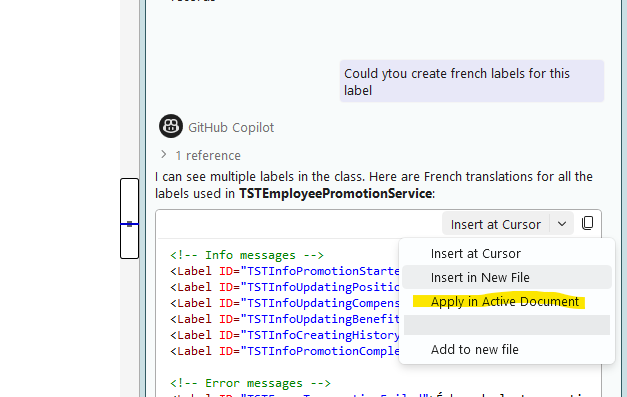
For creating and updating multiple files, agent mode is more suitable, which we will examine now.
Using Agent mode
You have already seen Agent mode in operation after Plan mode has handed over the execution to the Agent mode. We use Agent mode for auto-implementation of development tasks requiring multiple files to be generated or modified.
Let’s test it with a class that was previously developed with hardcoded label texts in it. We want to create labels in various languages in this class and apply them directly to FO label files. Open the class, add active document as reference, write your prompt and ask the agent to execute it:
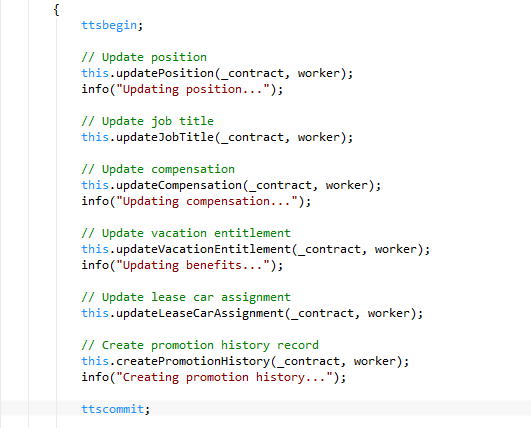
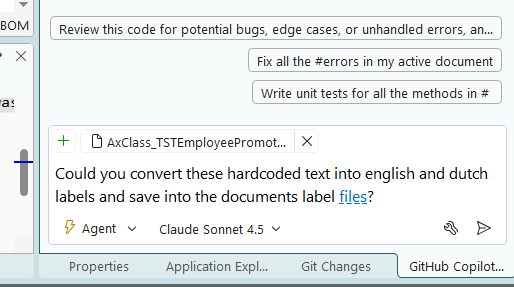
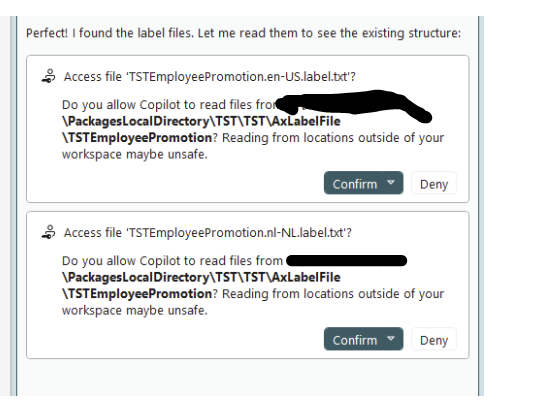
On the execution, it will ask you for confirmations multiple times, which is annoying at first, but you can select “always allow” to skip them for the next time:
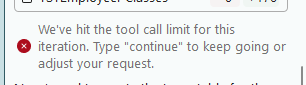
If your execution takes too long and hits your limits, you will be asked for continuation. If it happens, just type “continue” in the chat to go on:
At the end, it will provide you with the summary and all the files created for your prompt. Do not forget to click the tiny “Apply all” button here, or you will lose the changes:

That’s it. Here I give you some more useful and working example prompts for D365FO development, that you can use in Agent mode. Enjoy!
- Creating a template for SysOperation framework executable classes:
Create a skeleton for an executable job using D365FO SysOperation framework with an extensible execution dialog, add full TTS transaction security inside the execution method, add infolog messages to follow class execution and errors in English and Dutch languages inside the project's label files, with description "MyTicket". Add a test mode switch to the execution dialog that skips saving the records inside execution when checked, but outputs them as infolog messages.- Enriching a bare service executable class with informational infolog messages
This is a class that creates reservations for invent transfer table records. I want you to enrich this class with infolog logging to see how the operation is progressing. Add logs when the class starts running, what the parameters are, which transfer orders are processed, skipped, and which give errors. Group the logs with a class description prefix. Create labels in project label files in both English and Dutch languages and add 'MYTICKET' as a description on every label created.- Convert all the hardcoded labels in the project:
Could you create D365 Finance and Operations labels for all the hardcoded strings for the elements of this project, and update the hardcoded string parts with the created label file IDs. Create labels in Dutch, English, French, and German. Add label description to created labels as “MyProject”.- Create an EDT array for weekdays, like in the timesheets, with specific day information:
Add a new array type of EDT with day elements like the standard Days EDT, with description "Lazy day" and with dayindex suffix to end, counting until Day7. Also, adjust the labels and help text of these array elements with their day index. Create a label for all the string text in the project label file FM in English and Dutch languages, adding "MyTicket" in their description fields.- Create functional tests for created functionality (in plan mode) using SysTest framework:
Could you create functional and security automated tests for the functionality you have just created using SysTest framework